

Important terms to know before starting your 3D journey with Blender .


Before working and starting learning with any kind of 3D software consisting of a plethora of tools to create tons of types of digital content of animation or a design intuitively and let your creativity go wildly free it's very important to understand basic terms of digital media.
Without having a proper start to your journey, it creates a lot of confusion just by looking at the screen.
So here I am to help you with all the terms that can make your understanding better.
PIXEL
A Pixel (Google definition): a minute area of illumination on a display screen, one of many from which an image is composed.
This means that every image we see whether it is a Smartphone, TV, Laptop or Monitor is composed of small squares filled with a particular color from the color spectrum, usually aligned in a gradient manner so that combinations of those squares appear like a picture.
Analogy: “Like a grid of colors in a table of specific size “
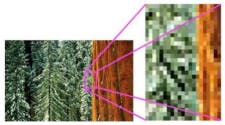
Resolution: it's a representation of (number of rows x number of columns) of pixels an image or display contains.
An image with a resolution of 1080x1920 (HD) which means a table with 1080 rows and 1920 columns filled with colored squares.
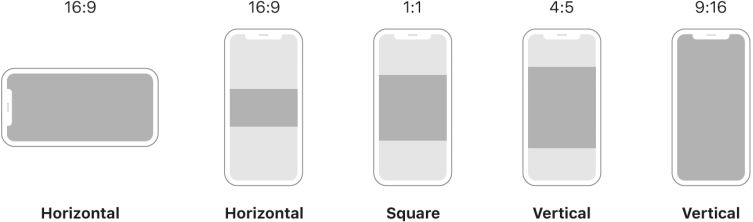
Aspect Ratio (Google definition): the ratio of the width to the height of an image or screen.
Which in this case means 1920 squares / 1080 squares hence a ratio of 16:9.
RENDERING TERMS
While searching about 3D or 2D Animation or designs we often come face to face with the term ”rendering” or a “render” which can confuse beginners that what is referred to by the word render and what it consists of.
What is a ” Render “?
A render is the final result of what is captured in the digital camera in a digital scene.
A render is produced by the graphics processing capability of the system, whether it can be a dedicated GPU or Graphics card or it can be GPU integrated in the processor of a system ie integrated graphics.
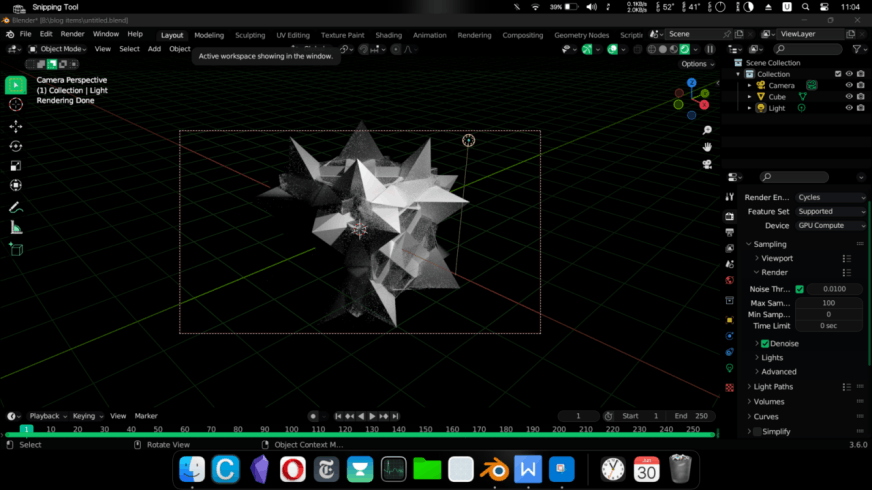
A render can simply be either a video or an image, where both of them can be broken down into frames.
Frame: a frame is just an image output of a camera at a particular position.
“Frame=Image “
Important point: In the case of a video, a video always comprises many images in a sequence, hence a video consists of a large number of frames, when viewed sequentially it appears that the object in the video is moving.
Frames per second (FPS): this represents that a video is made up of how many frames per second.
Simply meaning that how many images are we looking at every second in a video?
Normally for us humans, 24 Fps in a video looks like realistic motion to our eyes, anything more than 24fps will increase the smoothness of the video and anything less than 24fps will look stuttery and cartoonish in movement.
Hence Blender provides the default settings for renders as 24fps.
Now that we know that every render comes down to one single frame , hence controlling the quality of our renders depends on certain aspects that we can alter to produce desired beautiful results of our choice .
By changing the settings of these aspects there can be dramatically high difference in the visual quality of the output. Hence you must know about these terms.
Some of the important settings can be:
Resolution
Render Engine
Samples
Denoising
Light bounces
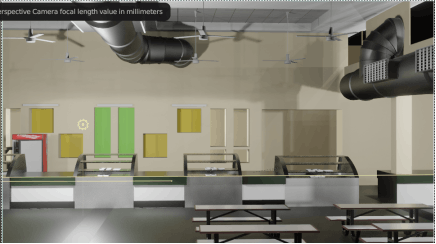
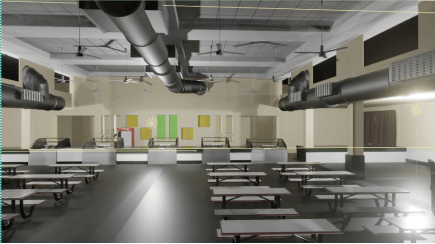
1 . Resolution
: Now according to the above explanations, increasing the resolution can increase the quality of an image but, it’ll also increase the time taken to render the image and resolution should always be chosen according to the aspect ratio that you want for your render and should not be unnecessarily high depending on the use case of the render, whether it can be the use case where your content may be zoomed in a lot of times or maybe your content is supposed to be viewed in high clarity on a display.

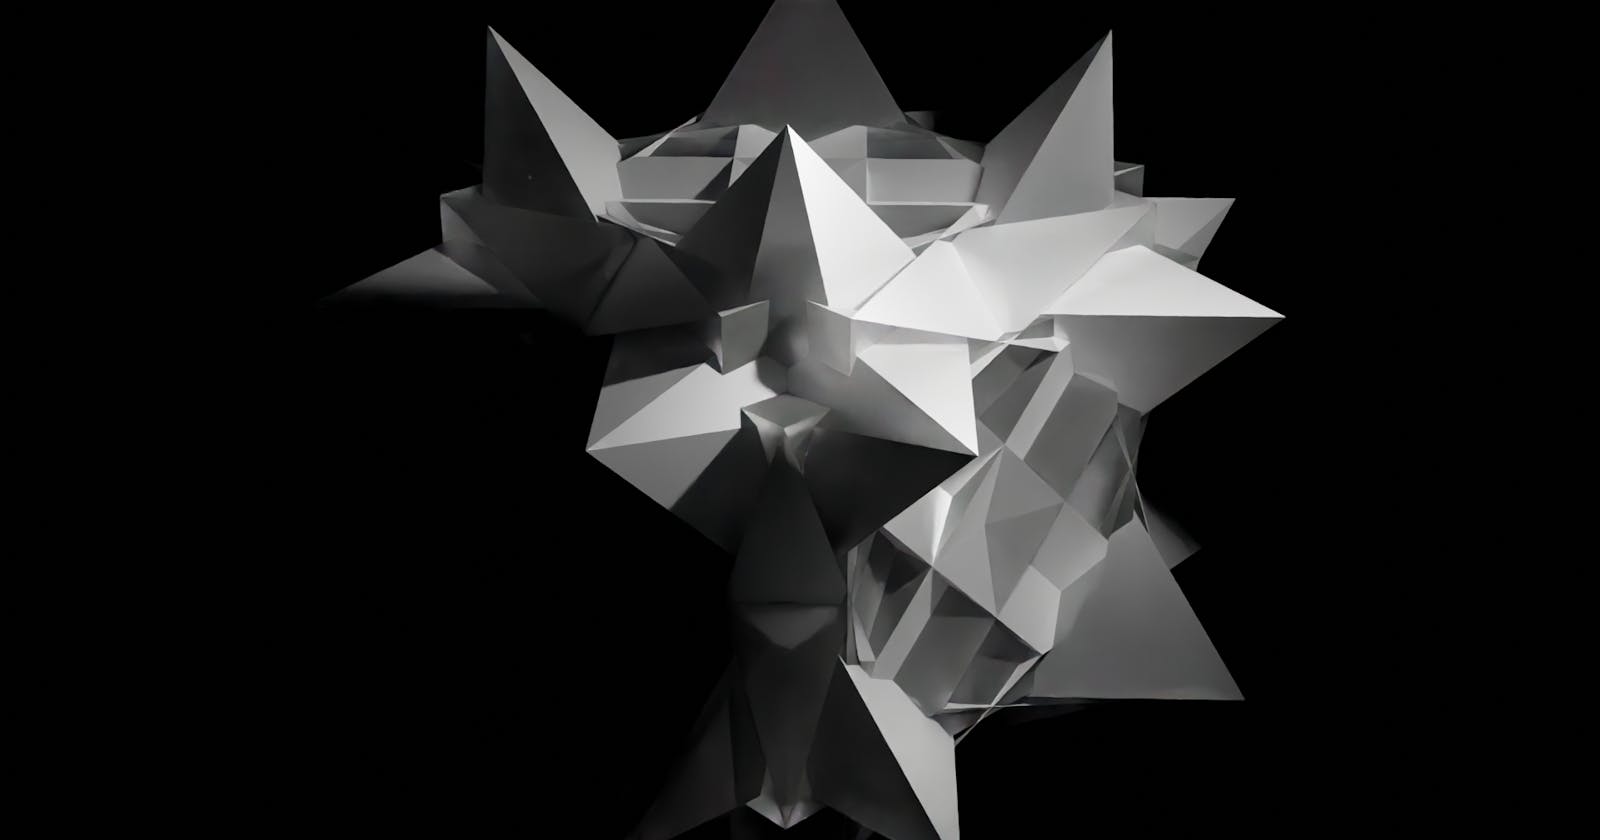
image 1 with 4k resolution

image 2 with 1080p resolution
2. Render Engine
: a render engine is a piece of software that can use a computer’s graphics capability to create the final output based on a 3d scene that we have created. There can be different render engines such as Corona, Vray, and Octane, including Cycles and Eevee from Blender. The main difference between different render engines is their use of the light in different ways to produce the results and hence it can also affect the render time and power required in different ways.
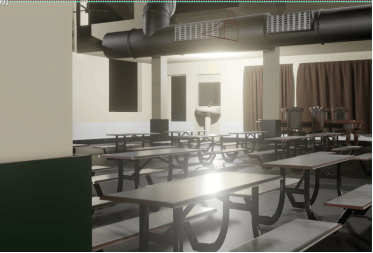
3.Samples (with denoiser)
: when we render an image, the render engine fetches the individual pixels of textures and colors that we have assigned to different surfaces in the scene from the memory.
By controlling the number of samples of the render we can tell the software how much color accuracy we want for the surfaces in the scene, fewer amount of samples for a render will result in more noise in the colors and more samples will reduce the color noise on pixel level and produce more clean and accurate looking results.
But, increasing the number of samples will increase the time taken to finish the render.
We can understand the concept by closely examining the image example below.

image 1 with 1 sample

image 2 with 100 samples
4.Denoising
: Denoising is the process where the system uses machine learning to smartly process out the noise left because of fewer samples and produces clean results and the aim is to reduce time.
Theoretically, we can remove the noise by rendering using a vast amount of samples, but practically it’ll require an equally large amount of rendering time.
When we render an image even with good resolution, the render requires an insanely huge amount of samples to properly render an image without leaving empty fragments of white pixels called noise.
We can see an example to understand what noise means without a denoiser and with a denoiser with a fairly adequate amount of samples in both cases.

Image 1 with 100 samples without denoiser

Image 2 with 100 samples with denoiser
Important :
in the above cases, note that;
: in the case where samples are portrayed the example was given to explain the difference between fewer samples and adequate samples with denoising present all along.
and in the case where denoising is portrayed, the aim was to explain the difference between non-denoised and denoised results with an adequate amount of samples present all along.
Fewer samples without denoiser -->noise
Fewer samples with denoiser --> color noise
Adequate samples with denoiser -->no noise
5.Light bounces
: The amount of light bounces controls the number of times you want the light rays to be bouncing from different surfaces in the digital scene you created. Light bounces is a setting to be adjusted for the scene but it directly affects the render.
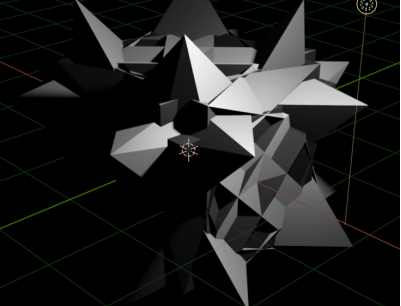

image 1 represents the result with 0 light bounces
and image 2 represents the results with 12 light bounces which is the blender's default setting.
Increasing the light bounces always increases the brightness and adds to the realism of the scene as in the real world there are an infinite number of light bounces with an infinite number of surfaces that we can see.
Increasing the light bounces also uses up more computational power.
The bottom line is, various parameters including these important ones can optimize the scene for the best settings visually and reduce the render time to its minimum.
BASIC CAMERA TERMS
Focal length
: controls the amount of zoom, i.e. the amount of the scene which is visible all at once. Longer focal lengths result in a smaller FOV (more zoom), while short focal lengths allow you to see more of the scene at once (larger FOV, less zoom). By controlling the focal length we can get the effect like a wide-angle lens where it starts to curve on the edges.
Here the first image portrays more focal length and second image portrays less focal length.
Depth of field
: not to be confused with focal length, depth of field produces an effect where the object in focus is more clear and the distant objects or background or foreground elements become blurred.
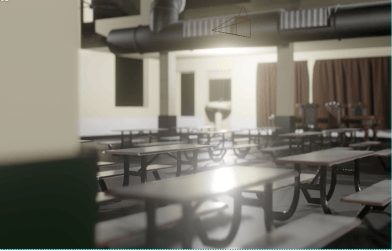
However it can be adjusted, the depth of field works very differently according to the different scales of the objects.
If we are trying to film a scene with human-scale objects, interior or exterior of real-scale houses the depth of field will produce little blur whereas if we are trying to film small-scale toys and objects, the depth of field will produce a lot of blur, that is the reason that we should always try to produce 3d objects and scenes as we see them in the real world.
CONCLUSION
These were some very basic terms and aspects that are very important to know before proceeding to any 3D software and creating your digital creation.
Two same scenes can look very different visually in the final render depending on the experience of the person working and hence there are a lot of aspects of modeling, animation and visual effects that are to be kept in mind while working with these tools and the right combination of different settings can help to achieve pleasing and photorealistic results very easily.
Hope you like the information shared in this article and stay connected for more.
Connect with me on Linkedin :